I started this tree about a month and a half ago. I really didn't have a plan for it, didn't plan on making it into a kit or pattern for sale on my website. I was just making it. I really didn't even know if it would work out. After setting it aside to work on other things I finally finished it up today and by gosh, I think it's pretty cute. So, I thought I'd show you how I did it. I didn't plan on showing a tutorial of it so I didn't capture all the steps but it's really pretty easy.
First, you want to have a decent template and size it to the size styrofoam cone you have. I will warn you that my tree is little, not more than 9 inches tall and it took a 1/2 yard of wool plus a couple strips more. And, when it comes right down to it, it's pretty boring, you are literally just pulling pieces and it takes a LOT of pieces to form the tree. I'd say I had 4-5 nights of pulling loops, 1-2 hours a night. But, I knew the end result would be cool and honestly, sometimes you just don't want to do something that requires any thinking. I know I don't!
I found this template on clipart, a free downloadable template. Make it the size you would like. As I said, I'd make it no bigger than 8 or 9 inches. You will need to have some monks cloth, linen or burlap and a rug hooking hook. Trace the template onto your fabric, making sure the straight edge follows the straight of your fabric.
I used 1/2 yd of green wool cut into 3/8 inch (or #9 in the rug hooking world) strips. I then cut those strips into 1-1/2 - 2 inch pieces.
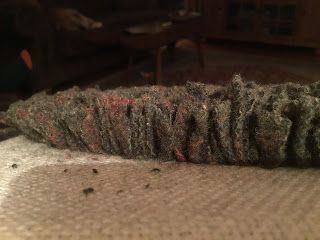
Then, start pulling! It's proddy time! Pull one side of the piece up through one hole, move over a couple holes and pull the other side up, making sure the ends are even. You don't have to fill in tightly, trust me. My tree looks very packed and as you can see by the next picture, I did not pack them, there is ample room in between each piece.
When you are done filling in your tree, trim the fabric to within 1 inch and fold to the back. I didn't press it because I didn't want to press any part of my tree down. If you were careful I suppose you could.....and don't tell anyone, but I used glue. I normally don't, but truth is, it's just for me and I wanted it done, so there! I glued my monks cloth to the back. I then matched up the edges to form the tree and carefully stitched them together. It was a very loose stitch, just enough to hold the two edges together. You do want to pull somewhat tight so your sides will blend together and you won't see any split.
Slide your tree over your styrofoam cone. I had to trim my cone down a bit. Then stuff the sides if desired. I wanted to my tree to have an oval feel as opposed to a round. I stuffed it rather tightly so it would be nice and firm.
Place your tree on your green wool and cut out your bottom. Hand stitch or (the horror), glue the fabric on. I glued again....remember, I wanted it done and it's for me!
Here's the bottom all glued on.
Find a unique base for your tree. You can use an old spool, a neat old box, a candle holder (like mine), a vintage tin...really the ideas are endless, and plop a star on top. So cute!!
Merry Christmas everyone!
Until next time.....


9 comments:
Very good explanation. Thank you.
Thank you for the tutorial and pictures..i have my first proddy started but i am definitely going to save this pattern; it is adorable. Our hooking guild did quilly trees this year as a group project, so much fun. i will add this to my forest for next year.
Soooo cute! Thanks for sharing! Merry Christmas!
Thank you! I was pleased with how it came out. Merry Christmas to you too!
Sounds like a plan! Thank you very much!
Thank you Peg!
Thank you so much and I have already bookmarked this page.Will keep adding more in the coming days Thanks for this post!slotxo
Want to play the best money making game? คาสิโนออนไลน์ answer your question Because it is open for all types of popular casino games. There are many to choose from.
My husband was diagnosed with CJD four years ago. After trying many treatments without success, we turned to NaturePath Herbal Clinic’s program. To our amazement, his alertness, strength, and independence improved it’s truly been life-changing for him and for our family.
If you or a loved one is facing CJD, I highly recommend their natural approach: www.naturepathherbalclinic.com
info@naturepathherbalclinic.com
Post a Comment